Compliance Note: All devices purchased with UTC funds must be properly managed within UTC's device management systems. This includes devices purchased for grants, research, etc. Additionally, any devices purchased with departmental procurement card. Devices purchased outside of established procurement procedures may not be eligible for guaranteed management or support.
Additionally, we strongly suggest that all staff and faculty start the purchase process by requesting a quote from Information Technology. This will ensure that the purchase will meet our supported device standards and have the proper warranties.
This guide is designed to help faculty and staff members navigate the process of purchasing a device through the Dash Marketplace and Dell Premier site. After your order arrives, please submit a new ticket to have the device properly imaged and set up. IT will then update our device records and complete the remaining steps to prepare the device for its new owner. Please follow the steps carefully below to complete your purchase efficiently.
Important Note: For any computer refresh devices, Central IT will handle the initial purchase and have the device shipped directly to our receiving location.
Jump to...
Purchasing Process Step-by-Step
Step 1: Choose Your Purchase Path
You have two options to get started:
Option A: (Recommended option) Submit an IT Procurement Ticket– If you're unsure what to order, submit a ticket including the type of device you're looking for, how it will be used, and any specific requirements. An IT team member will follow up with a recommendation and quote.
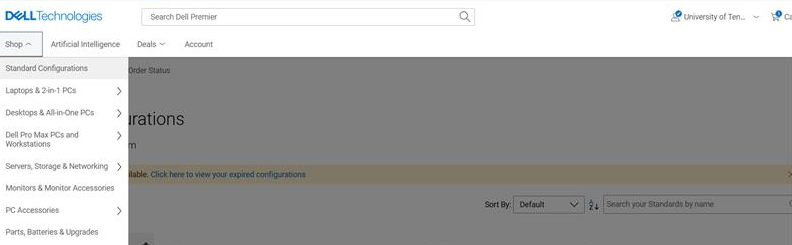
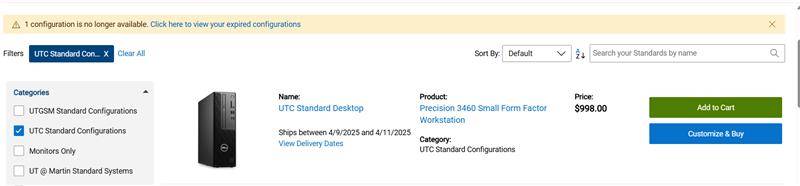
Option B: Browse Approved Devices– If you already know what you need, skip the ticket and head straight to our catalog of pre-approved devices in the Dash Marketplace or Dell Premier site. If you choose a UTC Standard Configuration Device, you can skip to Step 4: Create Order Requisition.
If you require a specialty build instead, please consult with IT first to ensure the device meets our minimum specifications and can be fully supported. Devices that do not meet these standards may not function properly within our UTC enterprise environment, and IT will not be obligated to support them.
How to get to UTC Standard Configuration Devices through Dell Premier site:
Step 2: Receive & Approve Quote: We will reach out with a quote for the device and will answer any additional questions. Once the quote is finalized, it will be sent back to the requester. We will provide information to finalize the purchase, including the Domain., Group Tag, Tenant ID.
Step 3: Purchase through Dash: Follow these navigation steps on DASH:
Single Sign-On > Procurement > Go More > Shop > Marketplace Catalogs > Dell P-Card Catalog > Quotes
Step 4: Enter quote & View/Buy Requisition
- Enter the quote number from the provided quote PDF, this should populate the existing quote.
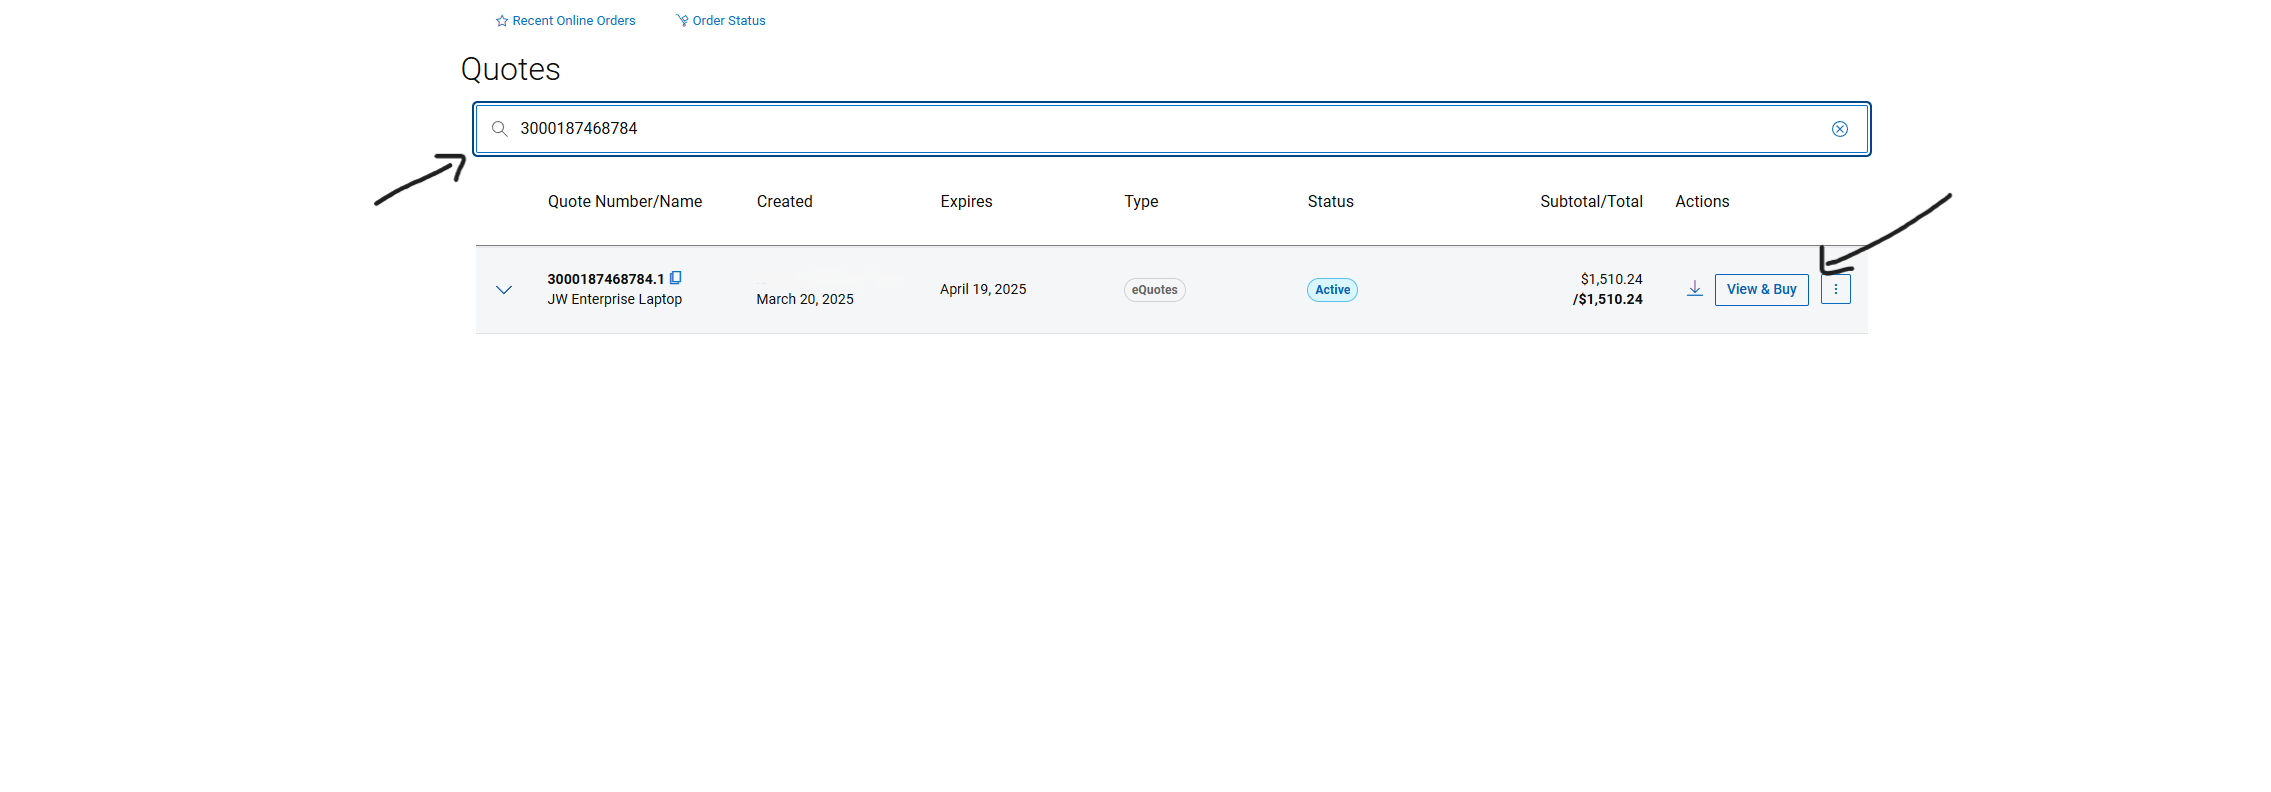
- Select View & Buy > Create Order Requisition (Select Office).
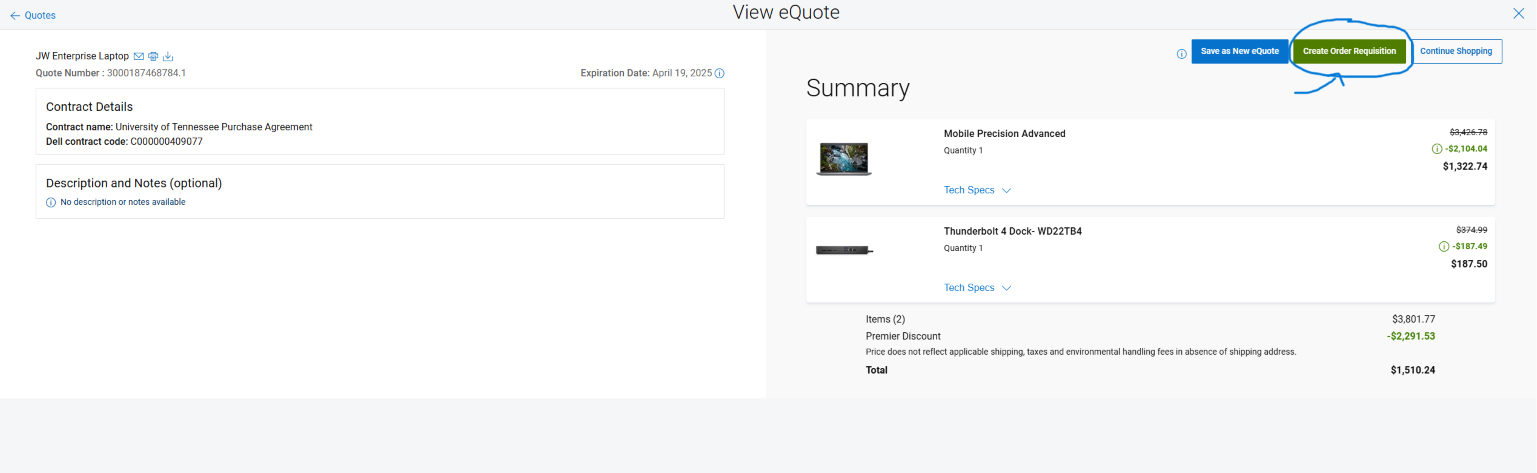

Step 5: Confirm & Submit the Requisition
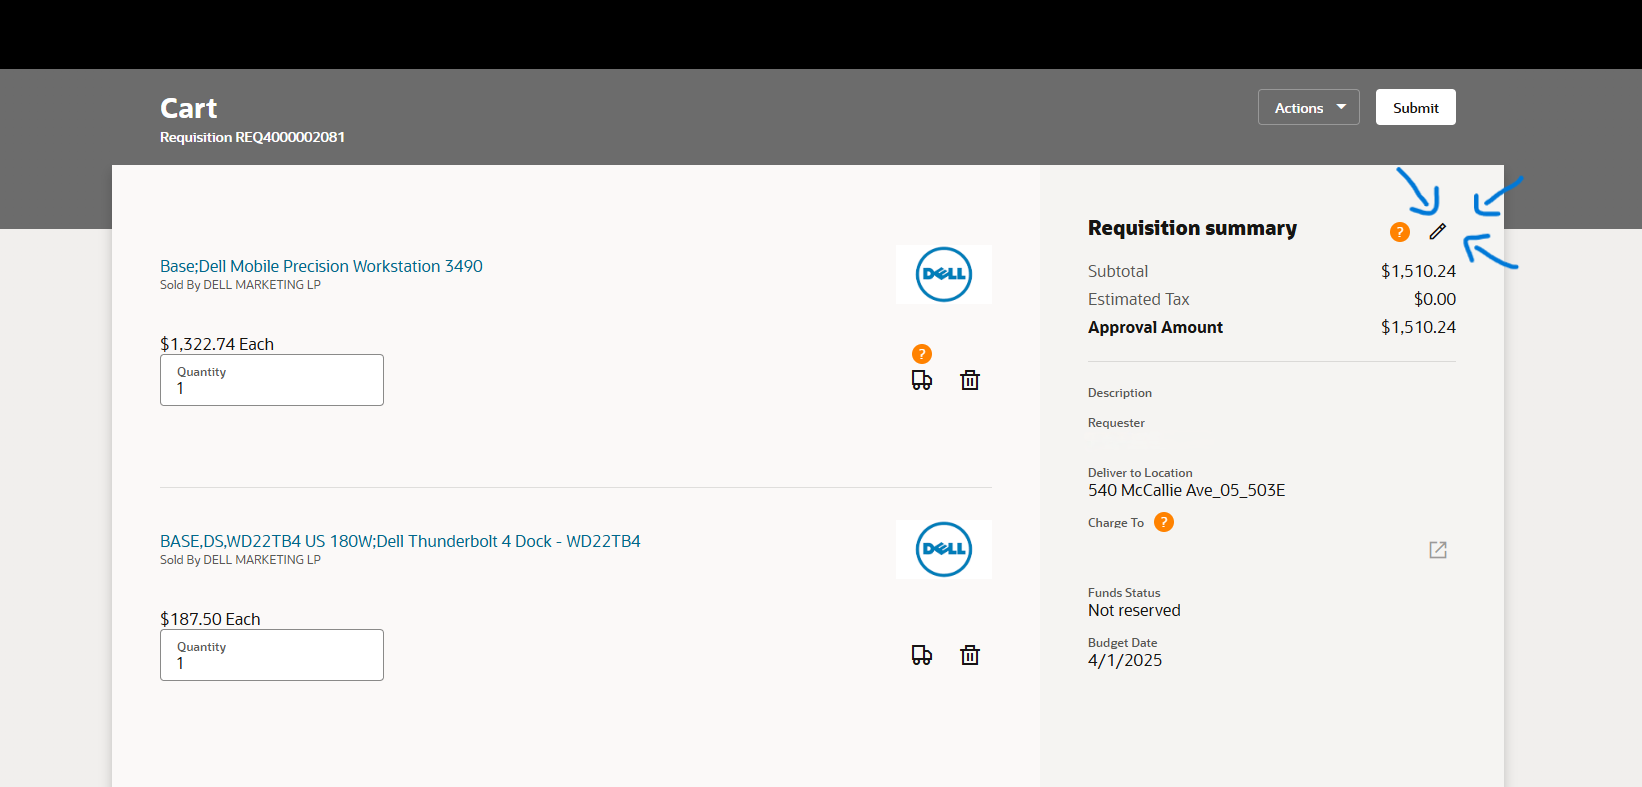
- Confirm details, submit requisition, and update in Dash.
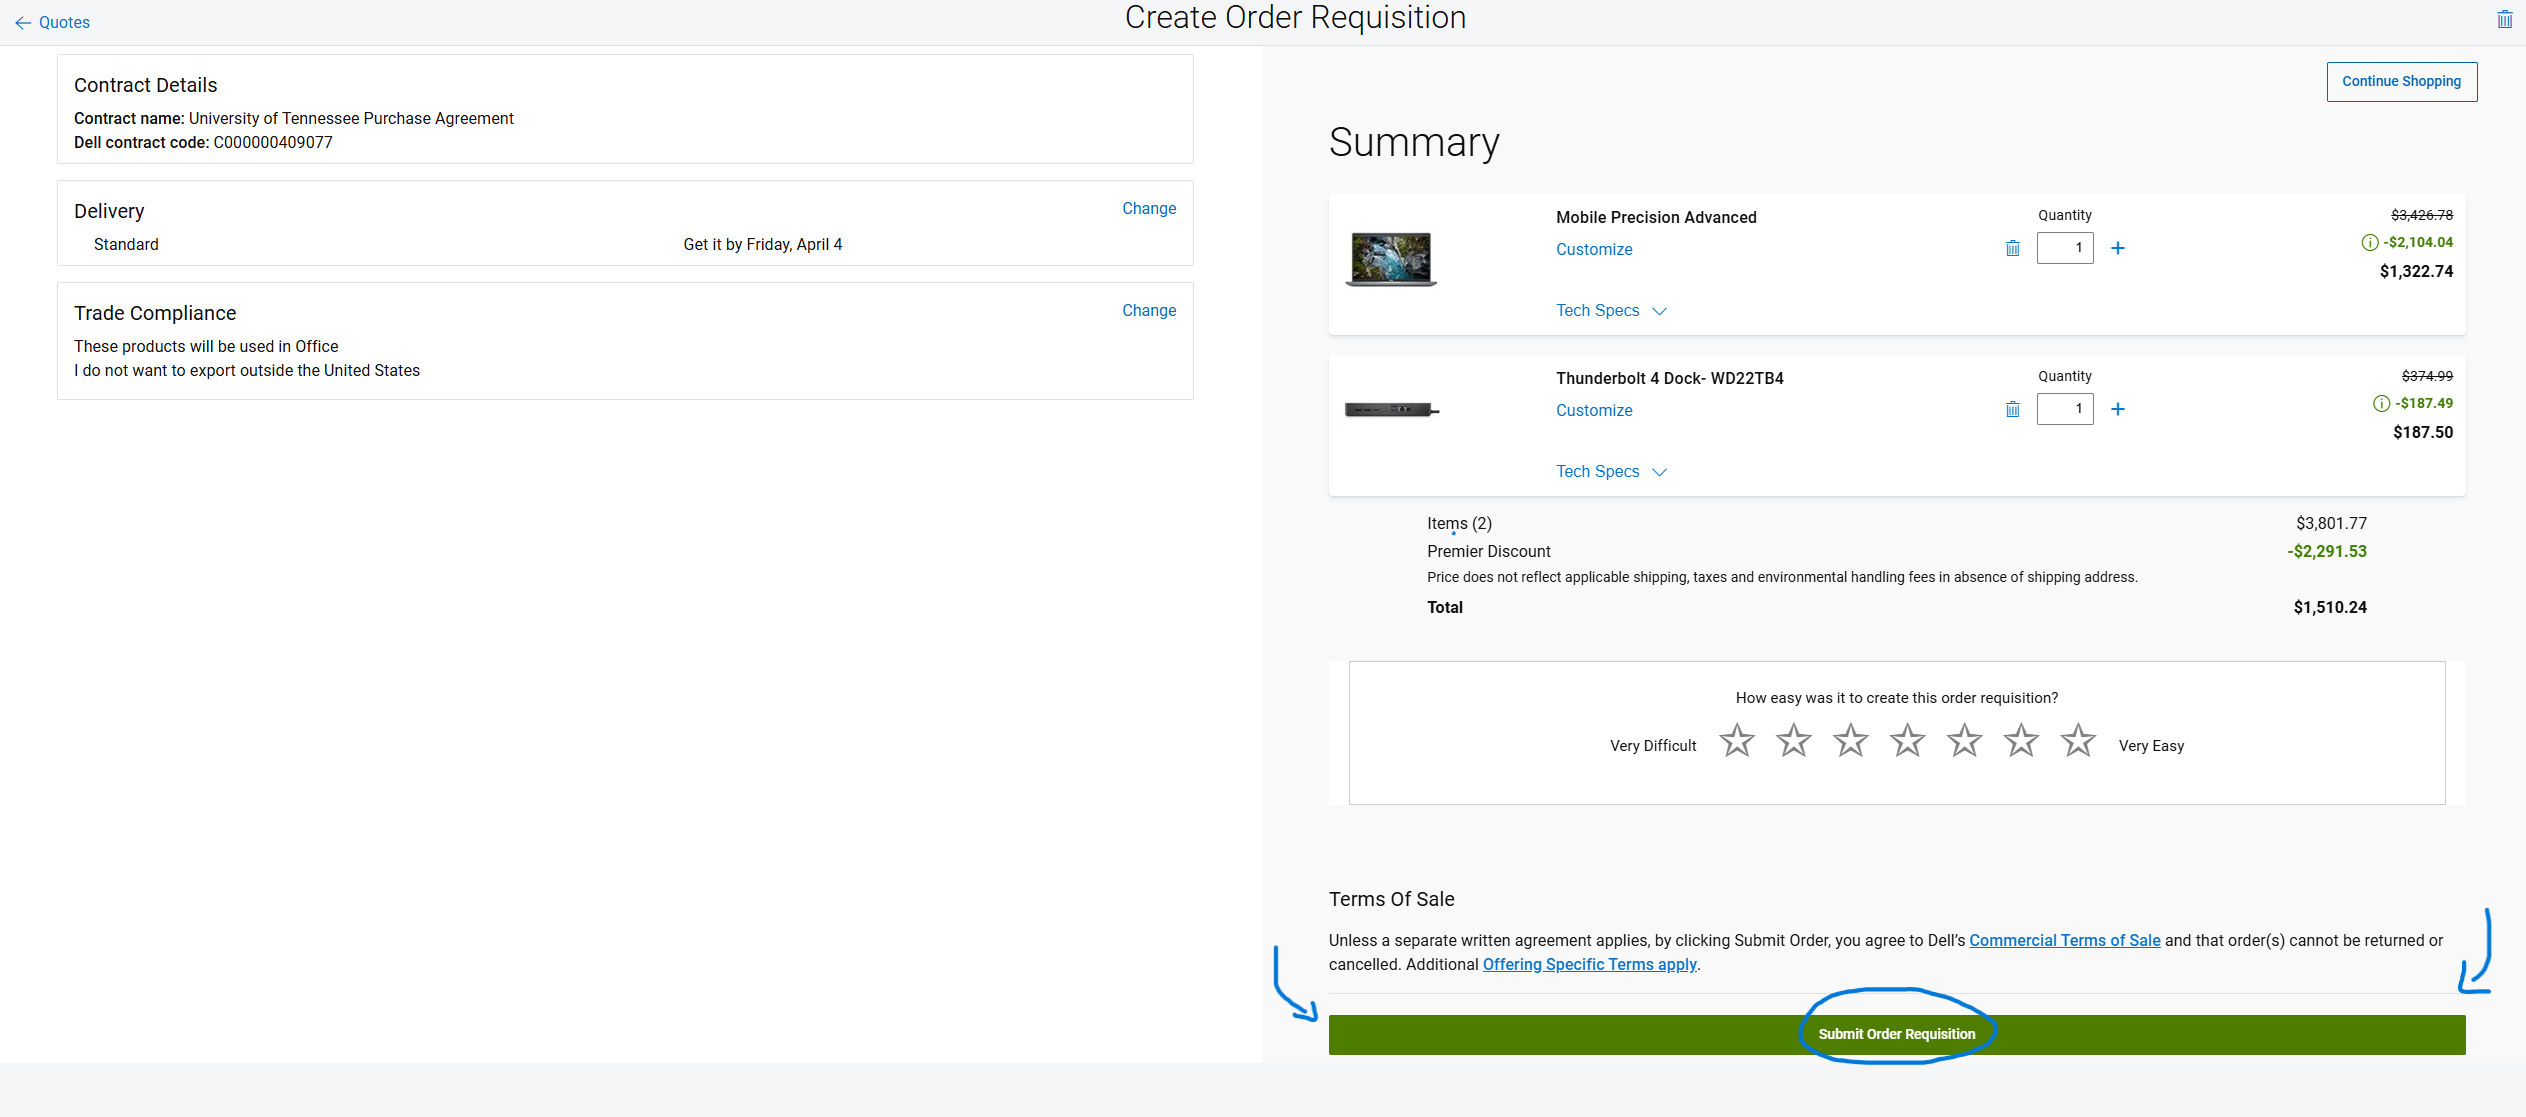
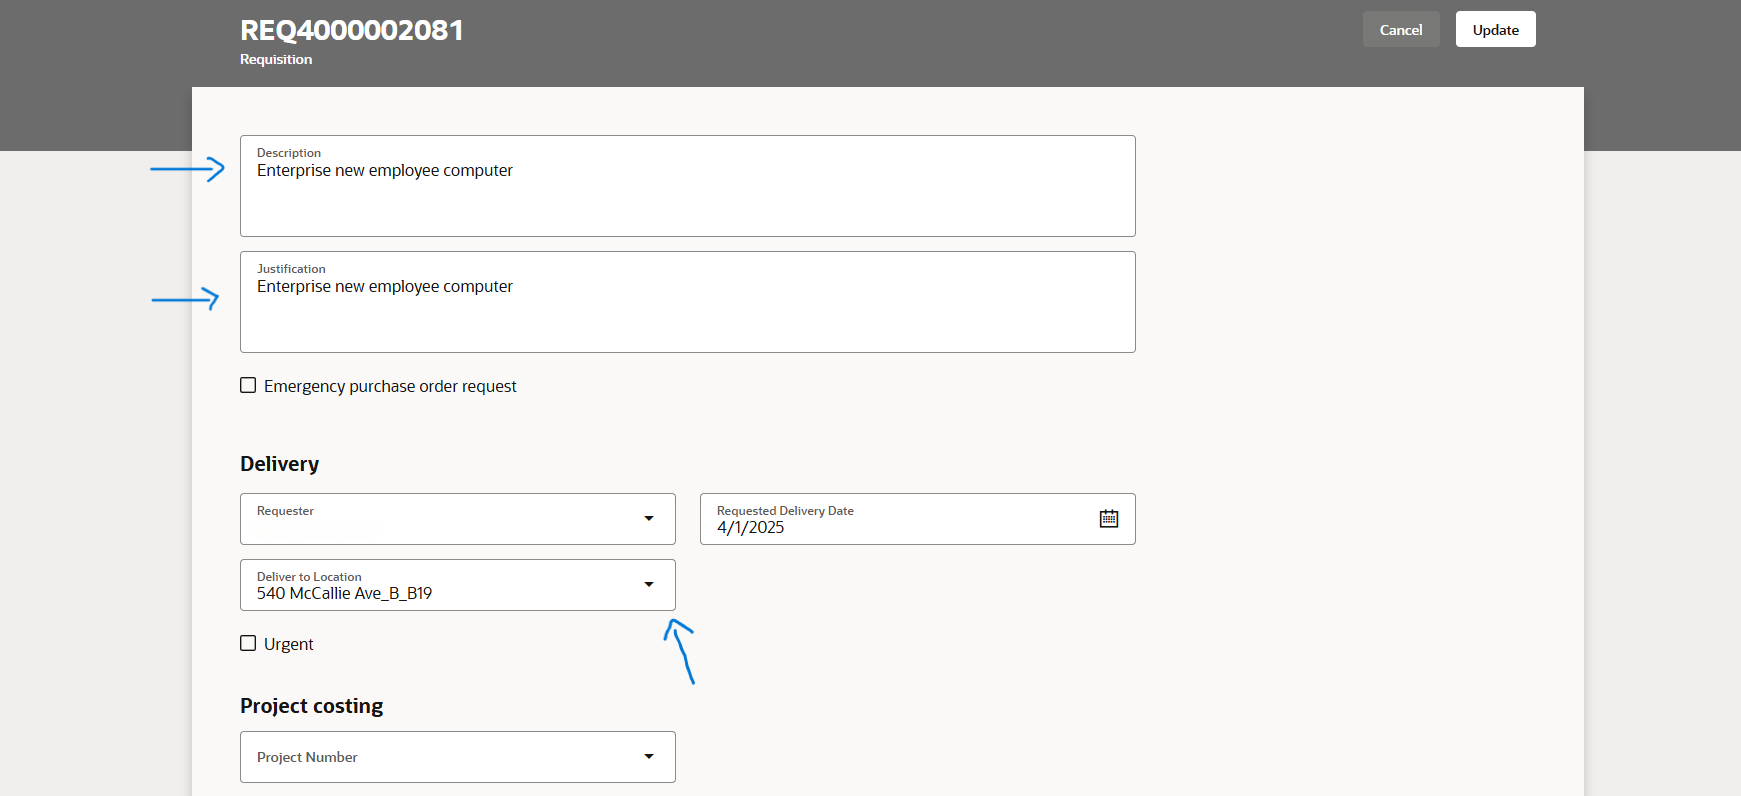
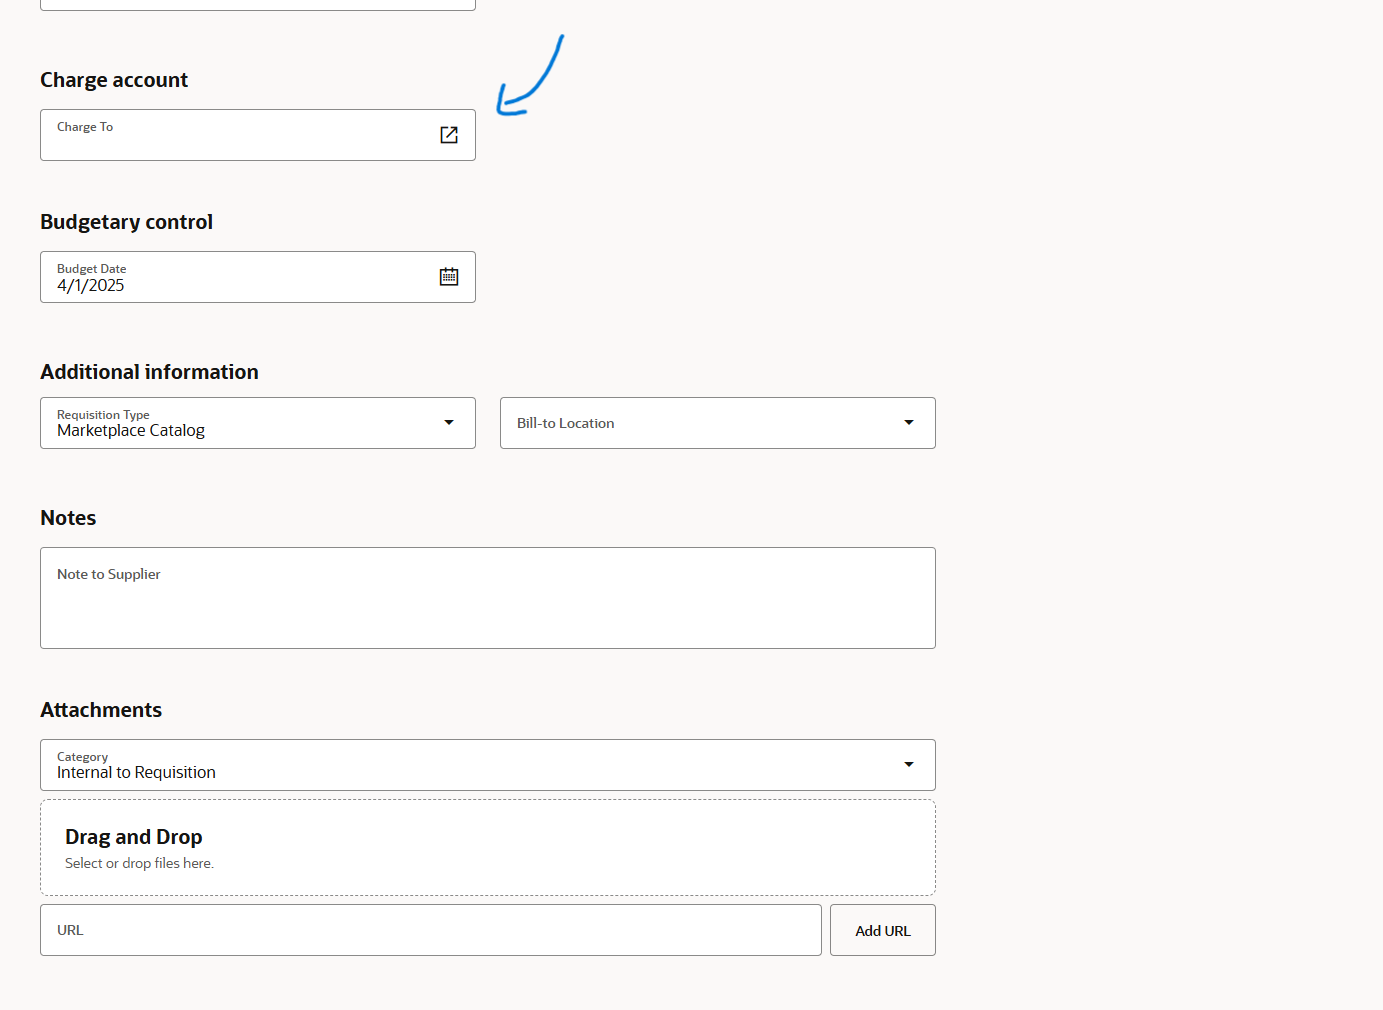
- Choose edit to enter a justification, charge account number, and shipping location.

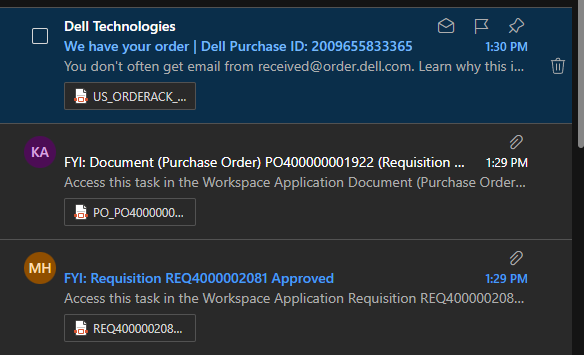
Step 6: Final Processing – Once the device is purchased, there will be an email sent that has general information on the device with a update data button. The link will navigate to a page where you will need to enter a Group Tag that we will provide you, a Domain, and Tenant ID.


(The information you will input in the fields in the image above will be provided to you)
Device Receipt & Setup
After your order arrives, please submit a new ticket to have the device properly imaged and set up. IT will then update our device records and complete the remaining steps to prepare the device for its new owner. Please provide the following information in the ticket:
- Device location for our techs to pick it up. You may also drop off the device in the IT Solutions Center, MacClellan Gym.
- Device purpose: How will this device(s) be used by your department.
- Device owner: Please include the UTCID and name of the primary owner of the device. If this will be shared device, then no owner is required.
Additional Support
Open an IT Helpdesk request ticket.
Send an email to ITHelp@utc.edu.
Contact the IT Help Desk at 423-425-4000 or visit our IT Chat Portal.
Return to top of page